仪表盘
仪表盘是后端的入口点,它们链接到一个或多个资源。仪表盘还显示一个主菜单来导航资源和已登录用户的信息。
假设你有一个简单的应用程序,其中包含三个 Doctrine 实体:用户、博客文章和类别。你的员工可以创建和编辑它们中的任何一个,但外部合作者只能创建博客文章。
你可以在 EasyAdmin 中按如下方式实现这一点
- 创建三个 CRUD 控制器(例如
UserCrudController、BlogPostCrudController和CategoryCrudController); - 为你的员工创建一个仪表盘(例如
DashboardController),并链接到这三个资源; - 为你的外部合作者创建一个仪表盘(例如
ExternalDashboardController),并且仅链接到BlogPostCrudController资源。
从技术上讲,仪表盘是常规的 Symfony 控制器,因此你可以执行通常在控制器中执行的任何操作,例如注入服务和使用快捷方式,如 $this->render() 或 $this->isGranted()。
仪表盘控制器类必须实现 EasyCorp,这确保了在仪表盘中定义了某些方法。除了实现接口之外,你还可以扩展 AbstractDashboardController 类。运行以下命令以快速生成仪表盘控制器
1
$ php bin/console make:admin:dashboard如果你现在访问应用程序的 /admin URL,你将看到默认的 EasyAdmin 欢迎页面
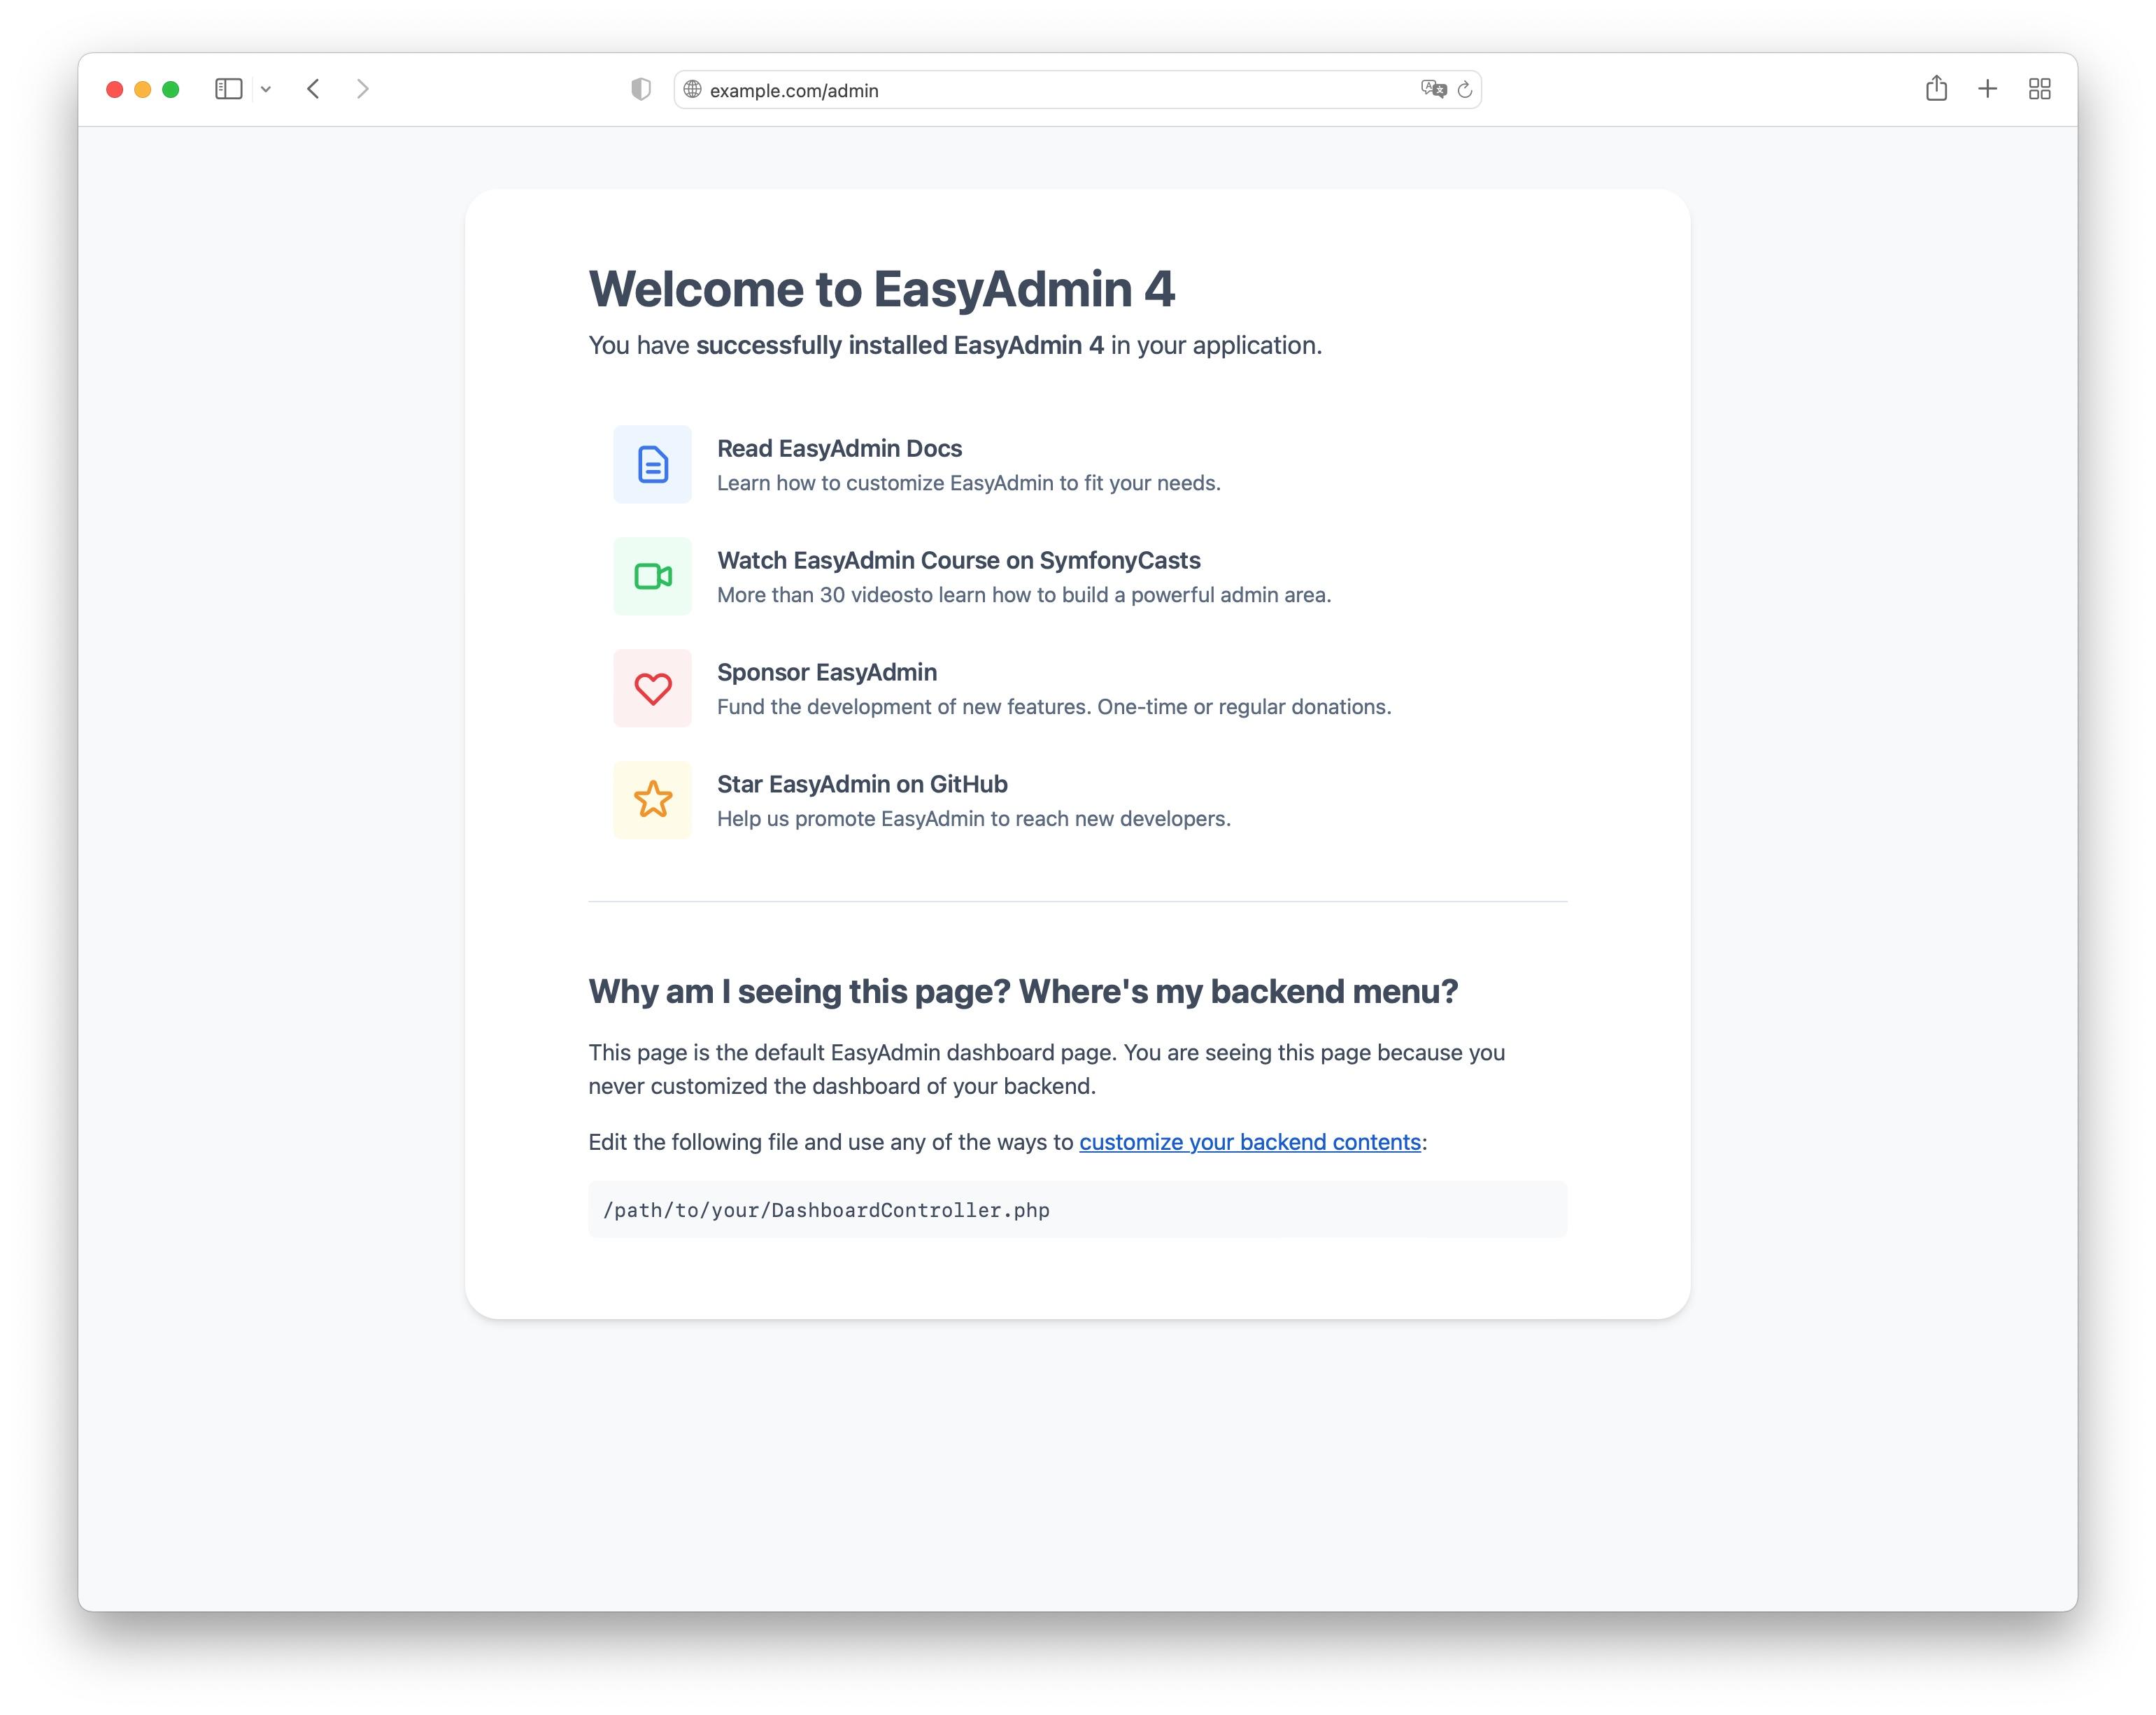
在本文的后面部分,你将学习如何自定义该页面。如果你没有看到欢迎页面,你可能需要配置后端的 URL,如下节所述。
漂亮的 Admin URL
4.14.0
对漂亮的 admin URL 的支持是在 EasyAdmin 4.14.0 中引入的。
EasyAdmin 后端定义了简洁且可预测的路由名称(例如 admin_product_index 或 admin_category_detail),这些名称生成简短而漂亮的 URL(例如 /admin/product 或 /admin/category/324)。
这要归功于你必须首先在应用程序中启用的 自定义 Symfony 路由加载器。为此,请创建此文件
1
2
3
4
# config/routes/easyadmin.yaml
easyadmin:
    resource: .
    type: easyadmin.routes
注意
easyadmin.routes 字符串也可以作为 PHP 常量
现在,使用以下 PHP 属性定义仪表盘类的主要路由(如果你还没有仪表盘,你可以运行命令 make:admin:dashboard 快速生成一个)
1
2
3
4
5
6
7
8
9
10
11
12
13
14
15
16
17
18
19
// src/Controller/Admin/DashboardController.php
namespace App\Controller\Admin;

use EasyCorp\Bundle\EasyAdminBundle\Attribute\AdminDashboard;
use EasyCorp\Bundle\EasyAdminBundle\Config\Dashboard;
use EasyCorp\Bundle\EasyAdminBundle\Controller\AbstractDashboardController;
use Symfony\Component\HttpFoundation\Response;
use Symfony\Component\Routing\Attribute\Route;

#[AdminDashboard(routePath: '/admin', routeName: 'admin')]
class DashboardController extends AbstractDashboardController
{
    public function index(): Response
    {
        return parent::index();
    }

    // ...
}
警告
仪表盘路由必须使用 #[AdminDashboard] 属性定义。Symfony 支持的其他任何配置路由的方式都将不起作用。
4.24.0
使用 #[AdminDashboard] 属性定义仪表盘路由的功能是在 EasyAdmin 4.24.0 中引入的。
EasyAdmin 使用 #[AdminDashboard] 属性的配置来创建仪表盘的主要路由。你可以通过运行以下命令来验证这一点
1
$ php bin/console debug:router提示
如果你没有看到任何应该由 EasyAdmin 生成的路由,请删除应用程序的缓存以强制重新生成路由。
提示
如果你正在实现多语言仪表盘,请将 _locale 参数添加到路由(例如 /admin/{_locale})。
index() 方法由 EasyAdmin 调用以渲染你的仪表盘。由于 index() 是 Dashboard 接口的一部分,因此你无法向其添加参数来注入依赖项。相反,请将这些依赖项注入控制器的构造函数方法中。
仪表盘路由的名称应该简洁,因为它用作与此仪表盘关联的所有路由的前缀(例如,如果此路由名称是 my_private_backend,则生成的路由将类似于 my_private_backend_product_index)。此路由的路径也将被所有仪表盘路由使用(例如,如果路径是 /_secret/backend,则生成的路由路径将类似于 /_secret/backend/category/324)。
就是这样。稍后,当你开始添加 CRUD 控制器时,路由加载器将为每个控制器创建所有需要的路由。
在 index() 方法中定义路由
使用 #[AdminDashboard] 属性是定义仪表盘路由的推荐方法。但是,你也可以通过在 index() 方法上应用 #[Route] 属性来定义仪表盘路由
1
2
3
4
5
6
7
8
9
10
11
12
13
// ...
use Symfony\Component\Routing\Attribute\Route;

class DashboardController extends AbstractDashboardController
{
    #[Route('/admin', name: 'admin')]
    public function index(): Response
    {
        return parent::index();
    }

    // ...
}
警告
此替代方法在 EasyAdmin 4.x 版本中仍然有效,但它已被弃用,并且在 EasyAdmin 5.x 中将不起作用。建议尽快更新仪表盘类以使用 #[AdminDashboard] 属性。
旧式的 Admin URL
注意
如果你在应用程序中使用漂亮的 admin URL,则可以完全跳过本节。
警告
旧式的 admin URL 已被弃用,并且在 EasyAdmin 5.0 中将不再起作用。升级你的应用程序以使用漂亮的 URL。
在引入漂亮的 admin URL之前,EasyAdmin 使用单个 Symfony 路由来服务所有仪表盘 URL。所需的信息使用查询字符串参数传递。如果你使用 make:admin:dashboard 命令生成了仪表盘,则路由是使用 Symfony 路由注解或 PHP 属性(如果项目需要 PHP 8 或更高版本)定义的。
唯一的要求是在名为 index() 的控制器方法中定义路由,该方法是 EasyAdmin 调用以渲染仪表盘的方法
1
2
3
4
5
6
7
8
9
10
11
12
13
14
15
16
17
18
19
20
// src/Controller/Admin/DashboardController.php
namespace App\Controller\Admin;

use EasyCorp\Bundle\EasyAdminBundle\Config\Dashboard;
use EasyCorp\Bundle\EasyAdminBundle\Controller\AbstractDashboardController;
use Symfony\Component\HttpFoundation\Response;
use Symfony\Component\Routing\Annotation\Route;

class DashboardController extends AbstractDashboardController
{
    /**
     * @Route("/admin")
     */
    public function index(): Response
    {
        return parent::index();
    }

    // ...
}警告
在不使用漂亮的 URL的后端中,Route 注解/属性是配置仪表盘路由的唯一推荐方法。#[AdminDashboard] 属性不适用于传统的(丑陋的)URL。
注意
由于 index() 是 Dashboard 接口的一部分,因此你无法向其添加参数来注入依赖项。相反,请将这些依赖项注入控制器的构造函数方法中。
注意
如果你正在实现多语言仪表盘,请将 _locale 参数添加到路由(例如 /admin/{_locale})。
/admin URL 只是一个默认值,因此你可以更改它。如果你这样做,请不要忘记在你的 Symfony 安全配置中也更新此值,以限制对整个后端的访问。
无需为此路由定义显式名称。Symfony 会自动生成路由名称,EasyAdmin 在运行时获取该值以生成所有 URL。但是,如果你在应用程序的其他部分生成指向仪表盘的 URL,则可以定义显式路由名称以简化你的代码
1 2 3 4 5 6 7 8 9 10 11 12 13 14 15 16 17 18 19 20
// src/Controller/Admin/DashboardController.php
namespace App\Controller\Admin;
use EasyCorp\Bundle\EasyAdminBundle\Config\Dashboard;
use EasyCorp\Bundle\EasyAdminBundle\Controller\AbstractDashboardController;
use Symfony\Component\HttpFoundation\Response;
use Symfony\Component\Routing\Annotation\Route;
class DashboardController extends AbstractDashboardController
{
/**
* @Route("/admin", name="some_route_name")
*/
public function index(): Response
{
return parent::index();
}
// ...
}如果你不使用注解,则必须在单独的文件中使用 YAML、XML 或 PHP 配置来配置仪表盘路由
1 2 3 4 5 6
# config/routes.yaml
dashboard:
path: /admin
controller: App\Controller\Admin\DashboardController::index
# ...实际上,你无需处理此路由或应用程序中的查询字符串参数,因为 EasyAdmin 提供了一项服务来生成 admin URL。
注意
使用单个路由来处理所有后端 URL 意味着生成的 URL 有点长且丑陋。这在许多情况下都可以,但如果你愿意,可以改用漂亮的 admin URL。
仪表盘配置
仪表盘配置在 configureDashboard() 方法中定义(主菜单和用户菜单在它们自己的方法中配置,稍后会解释)
1 2 3 4 5 6 7 8 9 10 11 12 13 14 15 16 17 18 19 20 21 22 23 24 25 26 27 28 29 30 31 32 33 34 35 36 37 38 39 40 41 42 43 44 45 46 47 48 49 50 51 52 53 54 55 56 57 58 59 60 61 62 63 64 65 66 67 68 69 70 71 72 73 74 75 76 77 78 79 80 81
namespace App\Controller\Admin;
use EasyCorp\Bundle\EasyAdminBundle\Attribute\AdminDashboard;
use EasyCorp\Bundle\EasyAdminBundle\Config\Dashboard;
use EasyCorp\Bundle\EasyAdminBundle\Controller\AbstractDashboardController;
use EasyCorp\Bundle\EasyAdminBundle\Dto\LocaleDto;
#[AdminDashboard(routePath: '/admin', routeName: 'admin')]
class DashboardController extends AbstractDashboardController
{
// ...
public function configureDashboard(): Dashboard
{
return Dashboard::new()
// the name visible to end users
->setTitle('ACME Corp.')
// you can include HTML contents too (e.g. to link to an image)
->setTitle('<img src="..."> ACME <span class="text-small">Corp.</span>')
// by default EasyAdmin displays a black square as its default favicon;
// use this method to display a custom favicon: the given path is passed
// "as is" to the Twig asset() function:
// <link rel="shortcut icon" href="{{ asset('...') }}">
->setFaviconPath('favicon.svg')
// the domain used by default is 'messages'
->setTranslationDomain('my-custom-domain')
// there's no need to define the "text direction" explicitly because
// its default value is inferred dynamically from the user locale
->setTextDirection('ltr')
// set this option if you prefer the page content to span the entire
// browser width, instead of the default design which sets a max width
->renderContentMaximized()
// set this option if you prefer the sidebar (which contains the main menu)
// to be displayed as a narrow column instead of the default expanded design
->renderSidebarMinimized()
// by default, users can select between a "light" and "dark" mode for the
// backend interface. Call this method if you prefer to disable the "dark"
// mode for any reason (e.g. if your interface customizations are not ready for it)
->disableDarkMode()
// by default, the UI color scheme is 'auto', which means that the backend
// will use the same mode (light/dark) as the operating system and will
// change in sync when the OS mode changes.
// Use this option to set which mode ('light', 'dark' or 'auto') will users see
// by default in the backend (users can change it via the color scheme selector)
->setDefaultColorScheme('dark')
// instead of magic strings, you can use constants as the value of
// this option: EasyCorp\Bundle\EasyAdminBundle\Config\Option\ColorScheme::DARK
// by default, all backend URLs are generated as absolute URLs. If you
// need to generate relative URLs instead, call this method
->generateRelativeUrls()
// set this option if you want to enable locale switching in dashboard.
// IMPORTANT: this feature won't work unless you add the {_locale}
// parameter in the admin dashboard URL (e.g. '/admin/{_locale}').
// the name of each locale will be rendered in that locale
// (in the following example you'll see: "English", "Polski")
->setLocales(['en', 'pl'])
// to customize the labels of locales, pass a key => value array
// (e.g. to display flags; although it's not a recommended practice,
// because many languages/locales are not associated to a single country)
->setLocales([
'en' => '🇬🇧 English',
'pl' => '🇵🇱 Polski'
])
// to further customize the locale option, pass an instance of
// EasyCorp\Bundle\EasyAdminBundle\Config\Locale
->setLocales([
'en', // locale without custom options
Locale::new('pl', 'polski', 'far fa-language') // custom label and icon
])
;
}
}4.1.0
disableUrlSignatures() 仪表盘方法在 EasyAdmin 4.1.0 中已被弃用,因为后端 URL 不再包含签名。
自定义仪表盘内容
生成的仪表盘默认显示一个“欢迎页面”,其中包含一些有用的链接。在实际应用程序中,你需要自定义此页面以显示你自己的内容。
仪表盘通常显示带有统计信息的窗口小部件和图表。EasyAdmin 尚未提供创建这些小部件的任何方法。这在我们的未来功能列表中,但与此同时,你可以使用 Symfony UX Chart.js 捆绑包来创建这些图表并在你自己的 Twig 模板中渲染它们
1 2 3 4 5 6 7 8 9 10 11 12 13 14 15 16 17 18 19 20 21 22 23 24 25 26 27
use EasyCorp\Bundle\EasyAdminBundle\Attribute\AdminDashboard;
use EasyCorp\Bundle\EasyAdminBundle\Config\Dashboard;
use EasyCorp\Bundle\EasyAdminBundle\Controller\AbstractDashboardController;
use Symfony\UX\Chartjs\Builder\ChartBuilderInterface;
use Symfony\UX\Chartjs\Model\Chart;
#[AdminDashboard(routePath: '/admin', routeName: 'admin')]
class DashboardController extends AbstractDashboardController
{
public function __construct(
private ChartBuilderInterface $chartBuilder,
) {
}
// ... you'll also need to load some CSS/JavaScript assets to render
// the charts; this is explained later in the chapter about Design
public function index(): Response
{
$chart = $this->chartBuilder->createChart(Chart::TYPE_LINE);
// ...set chart data and options somehow
return $this->render('admin/my-dashboard.html.twig', [
'chart' => $chart,
]);
}
}注意
由于 index() 是 Dashboard 接口的一部分,因此你无法向其添加参数来注入依赖项(例如上面示例中的 ChartBuilderInterface)。相反,请在控制器构造函数中注入依赖项,或使用与接口中定义的方法名称不同的方法名称。
要在你的自定义仪表盘上使用 EasyAdmin 的内置布局(例如左侧的主菜单栏 - 在下一节中解释),请使你的模板扩展 `vendor/easycorp/easyadmin-bundle/src/Resources/views/layout.html.twig` 并覆盖一些块
1
2
3
4
5
6
{# templates/admin/my_dashboard.html.twig #}
{% extends '@EasyAdmin/layout.html.twig' %}
{% block main %}
{# ... #}
{% endblock main %}另一个流行的选择是完全避免仪表盘,而是重定向到后端人员最常见的任务。这需要生成 admin URL和CRUD 控制器,这将在稍后详细解释
1 2 3 4 5 6 7 8 9 10 11 12 13 14 15 16 17 18 19 20 21 22 23 24 25 26 27
use EasyCorp\Bundle\EasyAdminBundle\Attribute\AdminDashboard;
use EasyCorp\Bundle\EasyAdminBundle\Config\Dashboard;
use EasyCorp\Bundle\EasyAdminBundle\Controller\AbstractDashboardController;
use EasyCorp\Bundle\EasyAdminBundle\Router\AdminUrlGenerator;
#[AdminDashboard(routePath: '/admin', routeName: 'admin')]
class DashboardController extends AbstractDashboardController
{
// ...
public function index(): Response
{
// when using pretty admin URLs, you can redirect directly to some route
return $this->redirectToRoute('admin_post_index');
// when using legacy admin URLs, use the URL generator to build the needed URL
$adminUrlGenerator = $this->container->get(AdminUrlGenerator::class);
// Option 1. Make your dashboard redirect to the same page for all users
return $this->redirect($adminUrlGenerator->setController(OneOfYourCrudController::class)->generateUrl());
// Option 2. Make your dashboard redirect to different pages depending on the user
if ('jane' === $this->getUser()->getUsername()) {
return $this->redirect('...');
}
}
}主菜单
主菜单从仪表盘链接到不同的CRUD 控制器。这是关联仪表盘和资源的唯一方法。出于安全原因,后端只能通过主菜单访问与仪表盘关联的资源。
主菜单是实现 EasyCorp 的对象的集合,这些对象配置每个菜单项的外观和行为
1 2 3 4 5 6 7 8 9 10 11 12 13 14 15 16 17 18 19 20 21 22 23 24 25 26 27 28
use App\Entity\BlogPost;
use App\Entity\Category;
use App\Entity\Comment;
use App\Entity\User;
use EasyCorp\Bundle\EasyAdminBundle\Attribute\AdminDashboard;
use EasyCorp\Bundle\EasyAdminBundle\Config\Dashboard;
use EasyCorp\Bundle\EasyAdminBundle\Controller\AbstractDashboardController;
#[AdminDashboard(routePath: '/admin', routeName: 'admin')]
class DashboardController extends AbstractDashboardController
{
// ...
public function configureMenuItems(): iterable
{
return [
MenuItem::linkToDashboard('Dashboard', 'fa fa-home'),
MenuItem::section('Blog'),
MenuItem::linkToCrud('Categories', 'fa fa-tags', Category::class),
MenuItem::linkToCrud('Blog Posts', 'fa fa-file-text', BlogPost::class),
MenuItem::section('Users'),
MenuItem::linkToCrud('Comments', 'fa fa-comment', Comment::class),
MenuItem::linkToCrud('Users', 'fa fa-user', User::class),
];
}
}MenuItem::new() 的第一个参数是项目显示的标签,第二个参数是要显示的图标。图标名称遵循模式 icon_set:icon_name,与 Symfony UX Icons 中使用的模式相同。
注意
默认情况下,EasyAdmin 假定图标名称对应于 FontAwesome CSS 类。必要的 CSS 样式和 Web 字体也默认包含在内,因此你无需采取任何其他步骤即可使用 FontAwesome 图标。或者,你可以使用你自己的图标集而不是 FontAwesome。
菜单项配置选项
所有菜单项都定义了以下方法来配置某些选项
setCssClass(string $cssClass),设置应用于菜单项的<li>父元素的 CSS 类;setLinkRel(string $rel),设置菜单项链接的relHTML 属性(查看 “rel”属性的允许值);setLinkTarget(string $target),设置菜单项链接的targetHTML 属性(默认_self);setPermission(string $permission),设置用户必须具有才能看到此菜单项的 Symfony 安全权限。阅读菜单安全参考以获取更多详细信息。setHtmlAttribute(string $name, mixed $value),在渲染菜单项的 HTML 元素中设置自定义 HTML 属性。setBadge($content, string $style='secondary', array $htmlAttributes = []),将给定的内容渲染为菜单项的徽章。它通常用于显示通知计数。第一个参数可以是任何可以在 Twig 模板中转换为字符串的值(数字、字符串、可字符串化 对象等)。第二个参数是预定义的 Bootstrap 样式之一(primary、secondary、success、danger、warning、info、light、dark)或任意字符串内容,该内容将作为与徽章关联的 HTML 元素的style属性的值传递。第三个参数允许在渲染徽章的元素中设置自定义 HTML 属性。
其余选项取决于每个菜单项类型,如下节所述。
菜单项类型
CRUD 菜单项
这是最常见的菜单项类型,它链接到某些 CRUD 控制器的某些操作。您必须传递与 CRUD 控制器关联的 Doctrine 实体的 FQCN (完全限定类名),而不是传递 CRUD 控制器的 FQCN。
1 2 3 4 5 6 7 8 9 10 11 12 13 14 15 16 17 18 19 20 21 22 23 24 25 26 27 28 29
use App\Entity\Category;
use EasyCorp\Bundle\EasyAdminBundle\Config\MenuItem;
public function configureMenuItems(): iterable
{
return [
// ...
// links to the 'index' action of the Category CRUD controller
MenuItem::linkToCrud('Categories', 'fa fa-tags', Category::class),
// links to a different CRUD action
MenuItem::linkToCrud('Add Category', 'fa fa-tags', Category::class)
->setAction('new'),
MenuItem::linkToCrud('Show Main Category', 'fa fa-tags', Category::class)
->setAction('detail')
->setEntityId(1),
// if the same Doctrine entity is associated to more than one CRUD controller,
// use the 'setController()' method to specify which controller to use
MenuItem::linkToCrud('Categories', 'fa fa-tags', Category::class)
->setController(LegacyCategoryCrudController::class),
// uses custom sorting options for the listing
MenuItem::linkToCrud('Categories', 'fa fa-tags', Category::class)
->setDefaultSort(['createdAt' => 'DESC']),
];
}仪表盘菜单项
它链接到当前仪表盘的首页。您可以使用“路由菜单项”(如下所述)实现相同的效果,但此项更简单,因为您不必指定路由名称(它会自动查找)。
1 2 3 4 5 6 7 8 9
use EasyCorp\Bundle\EasyAdminBundle\Config\MenuItem;
public function configureMenuItems(): iterable
{
return [
MenuItem::linkToDashboard('Home', 'fa fa-home'),
// ...
];
}路由菜单项
它链接到您的 Symfony 应用程序定义的任何路由。
1 2 3 4 5 6 7 8 9 10
use EasyCorp\Bundle\EasyAdminBundle\Config\MenuItem;
public function configureMenuItems(): iterable
{
return [
MenuItem::linkToRoute('The Label', 'fa ...', 'route_name'),
MenuItem::linkToRoute('The Label', 'fa ...', 'route_name', ['routeParamName' => 'routeParamValue']),
// ...
];
}注意
阅读关于 在 EasyAdmin 中集成 Symfony 控制器/操作 的章节,以充分理解 linkToRoute() 生成的 URL。
URL 菜单项
它链接到相对或绝对 URL。
1 2 3 4 5 6 7 8 9 10
use EasyCorp\Bundle\EasyAdminBundle\Config\MenuItem;
public function configureMenuItems(): iterable
{
return [
MenuItem::linkToUrl('Visit public website', null, '/'),
MenuItem::linkToUrl('Search in Google', 'fab fa-google', 'https://google.com'),
// ...
];
}为了避免将内部后端信息泄露给外部网站,EasyAdmin 会将 rel="noopener" 属性添加到所有 URL 菜单项,除非菜单项定义了自己的 rel 选项。
节菜单项
它在菜单项之间创建视觉分隔,并且可以选择显示一个标签,该标签充当下方菜单项的标题。
1 2 3 4 5 6 7 8 9 10 11 12 13 14
use EasyCorp\Bundle\EasyAdminBundle\Config\MenuItem;
public function configureMenuItems(): iterable
{
return [
// ...
MenuItem::section(),
// ...
MenuItem::section('Blog'),
// ...
];
}注销菜单项
它链接到用户必须访问才能从应用程序注销的 URL。如果您知道注销路由名称,则可以使用“路由菜单项”实现相同的效果,但此项更方便,因为它会自动为当前安全防火墙查找注销 URL。
1 2 3 4 5 6 7 8 9
use EasyCorp\Bundle\EasyAdminBundle\Config\MenuItem;
public function configureMenuItems(): iterable
{
return [
// ...
MenuItem::linkToLogout('Logout', 'fa fa-exit'),
];
}注意
注销菜单项在某些身份验证方案(如 HTTP Basic)下不起作用,因为由于这些身份验证方案的工作方式,它们没有配置默认注销路径。
如果您遇到类似“无法找到当前防火墙 LogoutListener,请手动提供提供程序密钥。”的错误,您需要删除注销菜单项或向您的身份验证方案添加注销提供程序。
退出模拟菜单项
它链接到用户必须访问才能停止模拟其他用户的 URL。
1 2 3 4 5 6 7 8 9
use EasyCorp\Bundle\EasyAdminBundle\Config\MenuItem;
public function configureMenuItems(): iterable
{
return [
// ...
MenuItem::linkToExitImpersonation('Stop impersonation', 'fa fa-exit'),
];
}子菜单
主菜单最多可以显示两级嵌套菜单。子菜单使用 subMenu() 菜单项类型定义。
1 2 3 4 5 6 7 8 9 10 11 12 13
use EasyCorp\Bundle\EasyAdminBundle\Config\MenuItem;
public function configureMenuItems(): iterable
{
return [
MenuItem::subMenu('Blog', 'fa fa-article')->setSubItems([
MenuItem::linkToCrud('Categories', 'fa fa-tags', Category::class),
MenuItem::linkToCrud('Posts', 'fa fa-file-text', BlogPost::class),
MenuItem::linkToCrud('Comments', 'fa fa-comment', Comment::class),
]),
// ...
];
}注意
在子菜单中,父菜单项不能链接到任何资源、路由或 URL;它只能展开/折叠子菜单项。
复杂的主菜单
configureMenuItems() 的返回类型是 iterable,因此您不必总是返回数组。例如,如果您的主菜单需要复杂的逻辑来决定为每个用户显示哪些项目,则使用生成器返回菜单项会更方便。
1 2 3 4 5 6 7 8 9 10 11 12
public function configureMenuItems(): iterable
{
yield MenuItem::linkToDashboard('Dashboard', 'fa fa-home');
if ('... some complex expression ...') {
yield MenuItem::section('Blog');
yield MenuItem::linkToCrud('Categories', 'fa fa-tags', Category::class);
yield MenuItem::linkToCrud('Blog Posts', 'fa fa-file-text', BlogPost::class);
}
// ...
}用户菜单
当访问受保护的后端时,EasyAdmin 会显示登录到应用程序的用户的详细信息以及包含诸如“注销”(如果启用了 Symfony 的 注销功能)等选项的菜单。
用户名是通过调用当前用户对象上的 __toString() 方法的结果。用户头像是通用头像图标。使用 configureUserMenu() 方法配置此菜单的功能和项目。
1 2 3 4 5 6 7 8 9 10 11 12 13 14 15 16 17 18 19 20 21 22 23 24 25 26 27 28 29 30 31 32 33 34 35 36 37 38 39
use EasyCorp\Bundle\EasyAdminBundle\Attribute\AdminDashboard;
use EasyCorp\Bundle\EasyAdminBundle\Config\MenuItem;
use EasyCorp\Bundle\EasyAdminBundle\Config\UserMenu;
use EasyCorp\Bundle\EasyAdminBundle\Controller\AbstractDashboardController;
use Symfony\Component\Security\Core\User\UserInterface;
#[AdminDashboard(routePath: '/admin', routeName: 'admin')]
class DashboardController extends AbstractDashboardController
{
// ...
public function configureUserMenu(UserInterface $user): UserMenu
{
// Usually it's better to call the parent method because that gives you a
// user menu with some menu items already created ("sign out", "exit impersonation", etc.)
// if you prefer to create the user menu from scratch, use: return UserMenu::new()->...
return parent::configureUserMenu($user)
// use the given $user object to get the user name
->setName($user->getFullName())
// use this method if you don't want to display the name of the user
->displayUserName(false)
// you can return an URL with the avatar image
->setAvatarUrl('https://...')
->setAvatarUrl($user->getProfileImageUrl())
// use this method if you don't want to display the user image
->displayUserAvatar(false)
// you can also pass an email address to use gravatar's service
->setGravatarEmail($user->getMainEmailAddress())
// you can use any type of menu item, except submenus
->addMenuItems([
MenuItem::linkToRoute('My Profile', 'fa fa-id-card', '...', ['...' => '...']),
MenuItem::linkToRoute('Settings', 'fa fa-user-cog', '...', ['...' => '...']),
MenuItem::section(),
MenuItem::linkToLogout('Logout', 'fa fa-sign-out'),
]);
}
}Admin 上下文
EasyAdmin 在每个后端请求上自动初始化类型为 EasyCorp 的变量。此对象实现了 上下文对象 设计模式,并存储后端不同部分常用的所有信息。
此上下文对象会自动注入到每个模板中,作为名为 ea(“EasyAdmin”的首字母)的变量。
1 2 3 4 5
<h1>{{ ea.dashboardTitle }}</h1>
{% for menuItem in ea.mainMenu.items %}
{# ... #}
{% endfor %}AdminContext 变量是在每个请求上动态创建的,因此您不能直接将其注入到您的服务中。相反,请使用 AdminContextProvider 服务来获取上下文变量。
1 2 3 4 5 6 7 8 9 10 11 12 13 14 15 16 17 18
use EasyCorp\Bundle\EasyAdminBundle\Provider\AdminContextProvider;
final class SomeService
{
private $adminContextProvider;
public function __construct(AdminContextProvider $adminContextProvider)
{
$this->adminContextProvider = $adminContextProvider;
}
public function someMethod()
{
$context = $this->adminContextProvider->getContext();
}
// ...
}在 EasyAdmin 的 CRUD 控制器和 集成到 EasyAdmin 的 Symfony 控制器中,在您想要注入上下文对象的任何参数中使用 AdminContext 类型提示。
1 2 3 4 5 6 7 8 9 10
use EasyCorp\Bundle\EasyAdminBundle\Context\AdminContext;
use Symfony\Bundle\FrameworkBundle\Controller\AbstractController;
class SomeController extends AbstractController
{
public function someMethod(AdminContext $context)
{
// ...
}
}翻译
后端界面使用 Symfony 翻译 功能进行完全翻译。EasyAdmin 自己的消息和内容使用 EasyAdminBundle 翻译域(感谢我们的社区慷慨地提供数十种语言的翻译)。
其余内容(例如,菜单项的标签、实体和字段名称等)默认使用 messages 翻译域。您可以使用 translationDomain() 方法更改此值。
1 2 3 4 5 6 7 8 9 10 11 12 13 14
#[AdminDashboard(routePath: '/admin', routeName: 'admin')]
class DashboardController extends AbstractDashboardController
{
// ...
public function configureDashboard(): Dashboard
{
return Dashboard::new()
// ...
// the argument is the name of any valid Symfony translation domain
->setTranslationDomain('admin');
}
}在内部,EasyAdmin 通过 TranslatableMessage 对象管理翻译。这些对象被传递到模板,在模板中它们被翻译成用户语言环境。您还可以使用 TranslatableMessage 对象来定义后端中的任何文本内容(例如,某些字段的标签、某些页面的帮助内容等)。
1 2 3 4 5 6 7 8 9 10
use function Symfony\Component\Translation\t;
use Symfony\Component\Translation\TranslatableMessage;
// creating translatable messages using objects
TextField::new('firstName', new TranslatableMessage('Name'))
TextField::new('firstName', new TranslatableMessage('Name', ['parameter' => 'value'], 'admin'))
// creating translatable messages using the t() function shortcut
TextField::new('firstName', t('Name'))
TextField::new('firstName', t('Name', ['parameter' => 'value'], 'admin'))提示
对于多语言后端,建议使用可翻译对象,因为 Symfony 可以自动提取所有这些对象以更新您的翻译文件。
后端使用 Symfony 应用程序中配置的语言。当语言环境为阿拉伯语 (ar)、波斯语 (fa) 或希伯来语 (he) 时,HTML 文本方向会自动设置为 rtl(从右到左)。否则,文本显示为 ltr(从左到右),但您可以显式配置此值。
1 2 3 4 5 6 7 8 9 10 11 12 13 14 15
#[AdminDashboard(routePath: '/admin', routeName: 'admin')]
class DashboardController extends AbstractDashboardController
{
// ...
public function configureDashboard(): Dashboard
{
return Dashboard::new()
// ...
// most of the times there's no need to configure this explicitly
// (default: 'rtl' or 'ltr' depending on the language)
->setTextDirection('rtl');
}
}提示
如果您希望后端使用与公共网站不同的语言,请将 {_locale} 参数添加到您的仪表盘路由,并使用 setLocales() 方法配置后端中可用的语言环境。
注意
存储在数据库中的内容(例如,博客文章的内容或产品的名称)未翻译。EasyAdmin 不支持将实体属性内容翻译成不同的语言。
页面模板
EasyAdmin 提供了几个页面模板,这些模板在您的仪表盘中添加自定义逻辑时非常有用。
登录表单模板
Twig 模板路径:@EasyAdmin/page/login.html.twig
它显示一个简单的用户名+密码登录表单,其样式与后端的其余部分匹配。该模板定义了许多配置选项,但大多数应用程序都可以依赖其默认值。
1 2 3 4 5 6 7 8 9 10 11 12 13 14 15 16 17 18 19 20 21 22 23 24 25 26 27 28 29 30 31 32 33 34 35 36 37 38 39 40 41 42 43 44 45 46 47 48 49 50 51 52 53 54 55 56 57 58 59 60 61 62 63 64 65 66 67 68 69 70 71 72 73 74 75 76 77 78 79 80 81 82 83 84
namespace App\Controller;
use Symfony\Bundle\FrameworkBundle\Controller\AbstractController;
use Symfony\Component\HttpFoundation\Response;
use Symfony\Component\Routing\Attribute\Route;
use Symfony\Component\Security\Http\Authentication\AuthenticationUtils;
class SecurityController extends AbstractController
{
#[Route("/login", name="login")]
public function login(AuthenticationUtils $authenticationUtils): Response
{
$error = $authenticationUtils->getLastAuthenticationError();
$lastUsername = $authenticationUtils->getLastUsername();
return $this->render('@EasyAdmin/page/login.html.twig', [
// parameters usually defined in Symfony login forms
'error' => $error,
'last_username' => $lastUsername,
// OPTIONAL parameters to customize the login form:
// the translation_domain to use (define this option only if you are
// rendering the login template in a regular Symfony controller; when
// rendering it from an EasyAdmin Dashboard this is automatically set to
// the same domain as the rest of the Dashboard)
'translation_domain' => 'admin',
// by default EasyAdmin displays a black square as its default favicon;
// use this method to display a custom favicon: the given path is passed
// "as is" to the Twig asset() function:
// <link rel="shortcut icon" href="{{ asset('...') }}">
'favicon_path' => '/favicon-admin.svg',
// the title visible above the login form (define this option only if you are
// rendering the login template in a regular Symfony controller; when rendering
// it from an EasyAdmin Dashboard this is automatically set as the Dashboard title)
'page_title' => 'ACME login',
// the string used to generate the CSRF token. If you don't define
// this parameter, the login form won't include a CSRF token
'csrf_token_intention' => 'authenticate',
// the URL users are redirected to after the login (default: '/admin')
'target_path' => $this->generateUrl('admin_dashboard'),
// the label displayed for the username form field (the |trans filter is applied to it)
'username_label' => 'Your username',
// the label displayed for the password form field (the |trans filter is applied to it)
'password_label' => 'Your password',
// the label displayed for the Sign In form button (the |trans filter is applied to it)
'sign_in_label' => 'Log in',
// the 'name' HTML attribute of the <input> used for the username field (default: '_username')
'username_parameter' => 'my_custom_username_field',
// the 'name' HTML attribute of the <input> used for the password field (default: '_password')
'password_parameter' => 'my_custom_password_field',
// whether to enable or not the "forgot password?" link (default: false)
'forgot_password_enabled' => true,
// the path (i.e. a relative or absolute URL) to visit when clicking the "forgot password?" link (default: '#')
'forgot_password_path' => $this->generateUrl('...', ['...' => '...']),
// the label displayed for the "forgot password?" link (the |trans filter is applied to it)
'forgot_password_label' => 'Forgot your password?',
// whether to enable or not the "remember me" checkbox (default: false)
'remember_me_enabled' => true,
// remember me name form field (default: '_remember_me')
'remember_me_parameter' => 'custom_remember_me_param',
// whether to check by default the "remember me" checkbox (default: false)
'remember_me_checked' => true,
// the label displayed for the remember me checkbox (the |trans filter is applied to it)
'remember_me_label' => 'Remember me',
]);
}
}内容页面模板
Twig 模板路径:@EasyAdmin/page/content.html.twig
它显示一个类似于索引/详细信息/表单页面的简单页面,带有主标题、侧边栏菜单和中心内容部分。唯一的区别是内容部分完全为空,因此它对于显示您自己的内容和自定义表单,将 Symfony 操作集成到 EasyAdmin 中等非常有用。示例
1 2 3 4 5 6 7 8 9 10 11 12 13 14 15 16 17 18 19 20 21 22 23 24 25 26
{# templates/admin/my-custom-page.html.twig #}
{% extends '@EasyAdmin/page/content.html.twig' %}

{% block content_title %}The Title of the Page{% endblock %}
{% block page_actions %}
    <a class="btn btn-primary" href="...">Some Action</a>
{% endblock %}

{% block main %}
    <table class="datagrid">
        <thead>
            <tr>
                <td>Some Column</td>
                <td>Another Column</td>
            </tr>
        </thead>
        <tbody>
            {% for data in my_own_data %}
                <tr>
                    <td>{{ data.someColumn }}</td>
                    <td>{{ data.anotherColumn }}</td>
                </tr>
            {% endfor %}
        </tbody>
    </table>
{% endblock %}